UI Overview#
This page gives an overview of each of the main elements of the demo UI and how to use them.
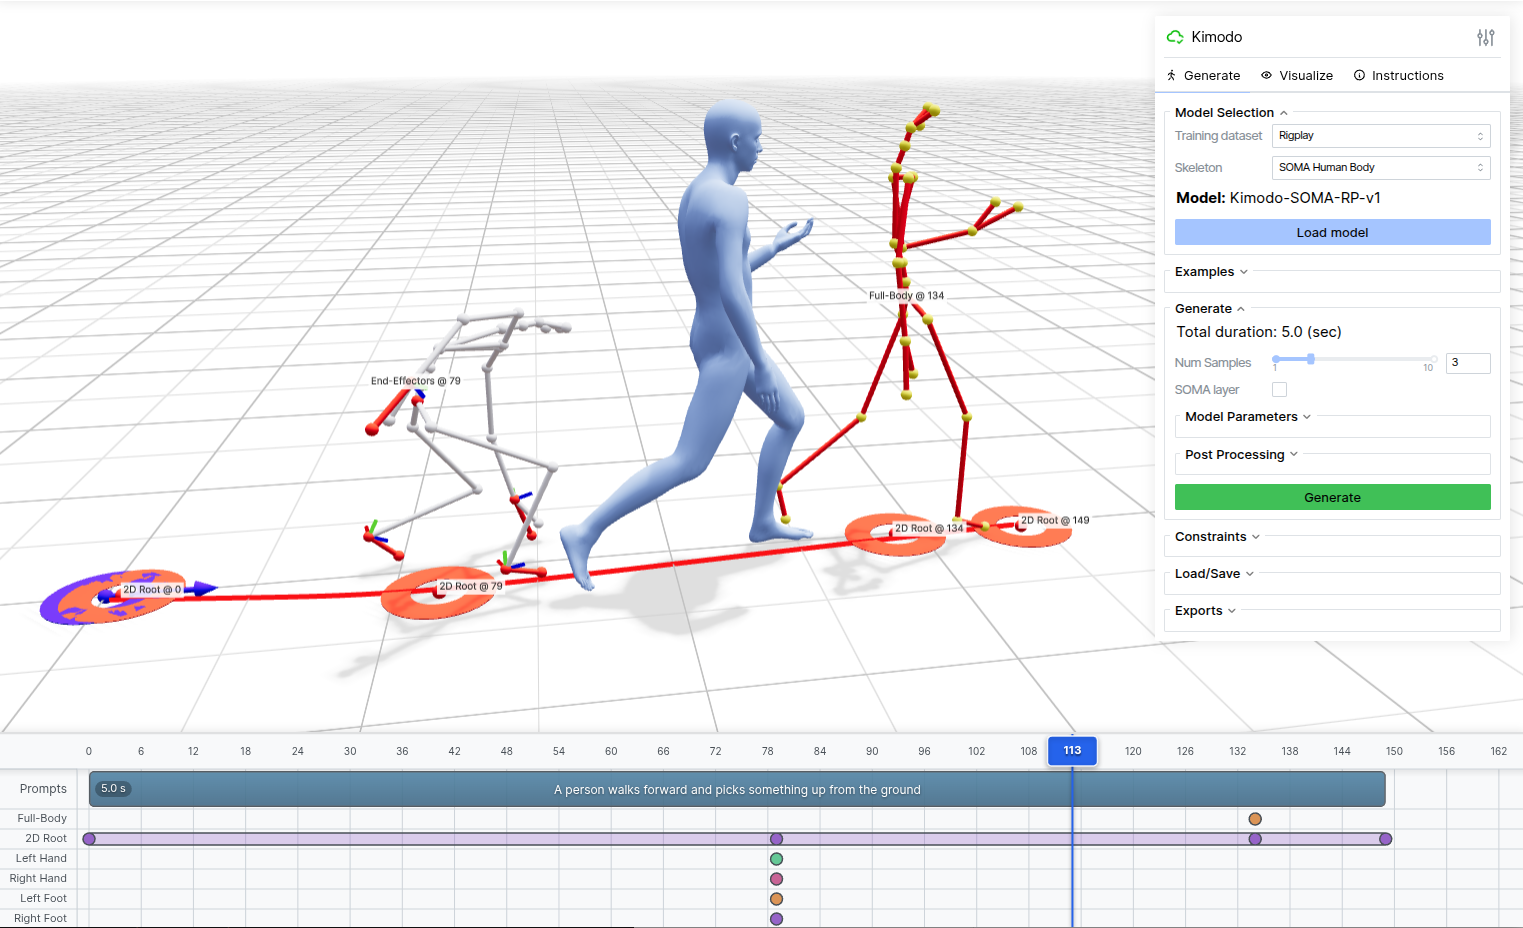 An example scene within the demo webapp
Viewer#
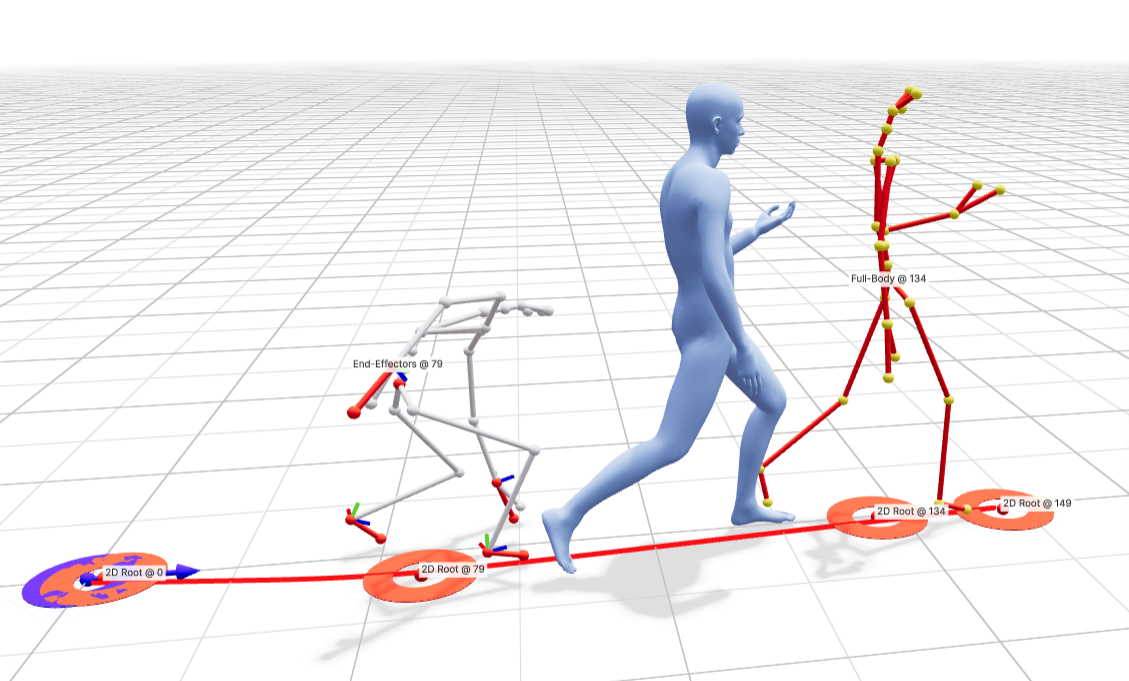
The 3D viewer shows the currently generated motion. It supports skeleton or skinned mesh rendering, which is configurable in the “Visualize” panel.
Camera#
Left-drag: rotate
Right-drag: pan
Scroll: zoom
Playback#
Space to play/pause
←/→ to step frames, or click the frame number.
Timeline#

The timeline is where you:
add, edit, and delete prompt segments
add and delete constraints at frames or intervals and adjust timing
Prompts#
Double-Click a text prompt to edit the text
Click and Drag the right edge of a prompt box to extend/shorten it (2-10 sec)
Click Empty Space to add a prompt
Right-Click a prompt to delete it
Constraints#
Constraints can be added after generating for the first time when there is an active motion in the viewer:
Click in the timeline tracks (Full-Body / 2D root etc) to add a constraint of that type using the pose at that frame
Ctrl/Cmd + Click + Drag to add an interval constraint, or expand a keyframe into an interval
Click + Drag an existing constraint to move it to a different frame
Right-Click on a constraint to delete it
To edit a constraint:
Move playback to the target frame
Click Enter Editing Mode in the Constraints tab of the Settings Panel. Note you must exit editing mode before generating again.
Settings Panel#
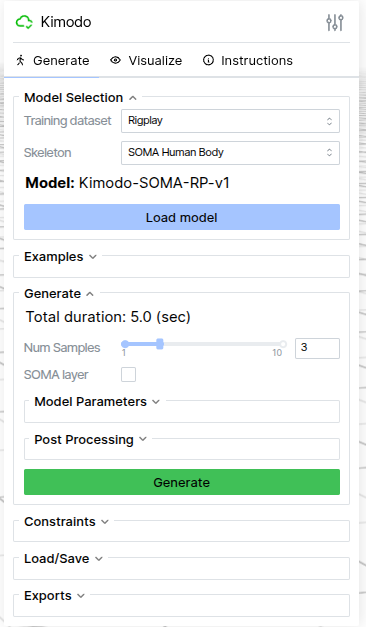
The settings panel includes:
model selection
loading examples
model parameter selection for generation and post-processing
parameters for constraint editing
motion loading and saving
visualization options
Important settings panels are individually explained on subsequent pages.